
Your WordPress builder is Elementor, one of the most popular WordPress CMS editors
There is an extensive help section on their website located here.
Contents
(In this section)
- Intro
- Creating a Blog Post
- Editing Existing Pages
- Updating the Documents Area
- Resizing Images
- Curator Feed
- Changing the Number of Profile Columns
1. Intro
Here are some basic instructions on editing your website.
There are some areas that you won’t be able to edit. We can update these areas for you, such as;
- The top menu
- The footer
- Forms
- Any custom-built areas or plugins
Backups
- We have a backup system running at all times, so you won’t lose anything if you accidentally delete any content.
Login details / User Editing
- You can access the website at any time with the login and password you have been provided with. If you forget your own password, you can reset it here via email.
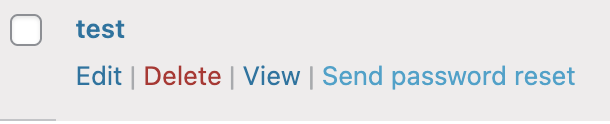
- To send a password reset (welcome email) to a user (view all member subscriber users here) hover over the desired user and click “Send password reset”.
Logging into your website
To log in, click here. Once you are logged in, you will see your dashboard. The main menu is down the left-hand side. From the dashboard, you can do the following (listed below are the most common options):
- Analytics Dashboard – view website visitor data – quick link
- Posts – view, create or edit blog posts (if you have a blog set up)
- Media – upload new photos for use
- Pages – view, create or edit pages (it’s recommended that the web developer sets up any new pages)
- Profile – change your password
Logging out of your website
To log out, go to the top right corner of the website, hover over your login name or icon and select ‘Log Out’.
2. Creating a Blog Post
- First, make sure you are logged in with the username and password provided.
- Navigate to your dashboard here.
- Using your left navigational toolbar, hover over ‘Posts‘ on the left-hand side and click ‘Add New‘.
- From here, you can do the following:

- Add a title for the blog post
- Add your content to the body section
- Optional: Use the ‘Add Media‘ button to add extra images to your post
- Tick a category the blog post falls under, e.g. ‘Tips’
- Optional – Add tags to help categorise your blog and make searching for the post easier
- Click the ‘Set featured image‘ text and upload a featured image (choose an image at least 1600px wide)
- Selecting a Featured Image:
- Choose from either an existing image in the ‘Media Library‘ or upload one from your desktop by choosing the ‘Upload Files‘ tab.
- Optional: Click the ‘Save Draft‘ button (top right panel) to save your post and continue it later
- Click the ‘Publish‘ button to show your post on the live site.
3. Editing Existing Pages
After you have logged into your website dashboard, select Visit Site from the upper-left menu on your Dashboard (under the house icon).
Navigate to the desired page and click Edit with Elementor on the top menu.
Next, click on the text in the middle of the screen, go to the left editing window, and start editing.
Note: Elements on the page may not display correctly when editing inside Elementor. That’s okay, your page will look fine once you save and exit Elementor.
Adding Links
Create links to your featured work by first highlighting the appropriate text, clicking the hyperlink icon in the editing menu, and then choosing the gear icon.
In the pop-up window, select the appropriate blog post and click Add Link.
Moving and Deleting Sections
Moving a Section: To move a section, hover your mouse over that section, click and hold the left Edit Section icon and drag-and-drop the section to where you’d like it to be.
Deleting a Section To delete a section on the page, you hover your mouse over that section and click the right Remove Section icon.
Make sure to click the Publish button in the top right corner (previously lower-left) to save the changes on your site.
When you’re done editing, you exit Elementor by clicking the upper-left menu and then clicking the Exit to Dashboard button.
4. Updating the Documents Area – Adding a new PDF
- Go to the my account page.
- Click on the ‘Edit with Elementor’ button in the top menu:

- Click into the link section you want to edit – you’ll see a pencil icon (this will bring up the left-hand-side editor)
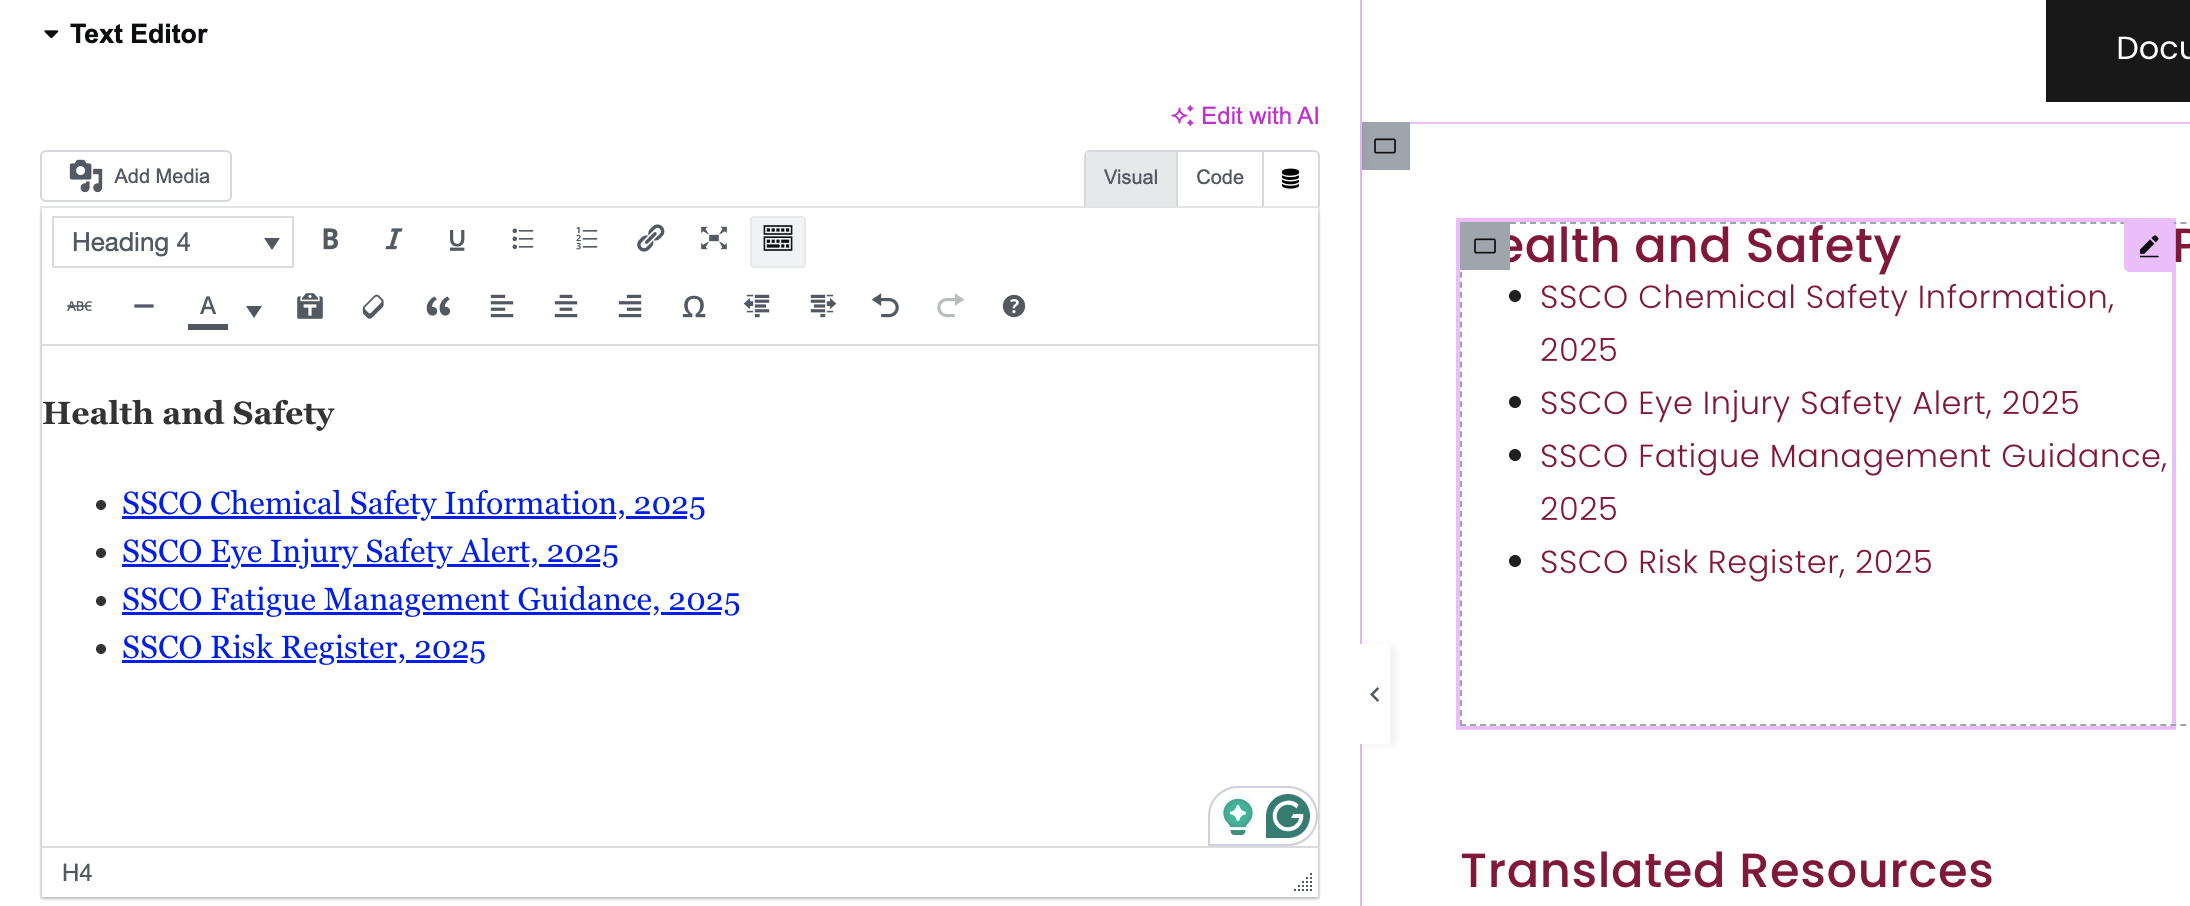
4. First click where you want to add the new PDF (starting a new bullet point). Then, using the editor, click on the ‘Add Media‘ button and upload the new PDF (this will add a hyperlink to the PDF document).
5. Rename the link as desired.
6. Click ‘Publish’ in the top right corner.
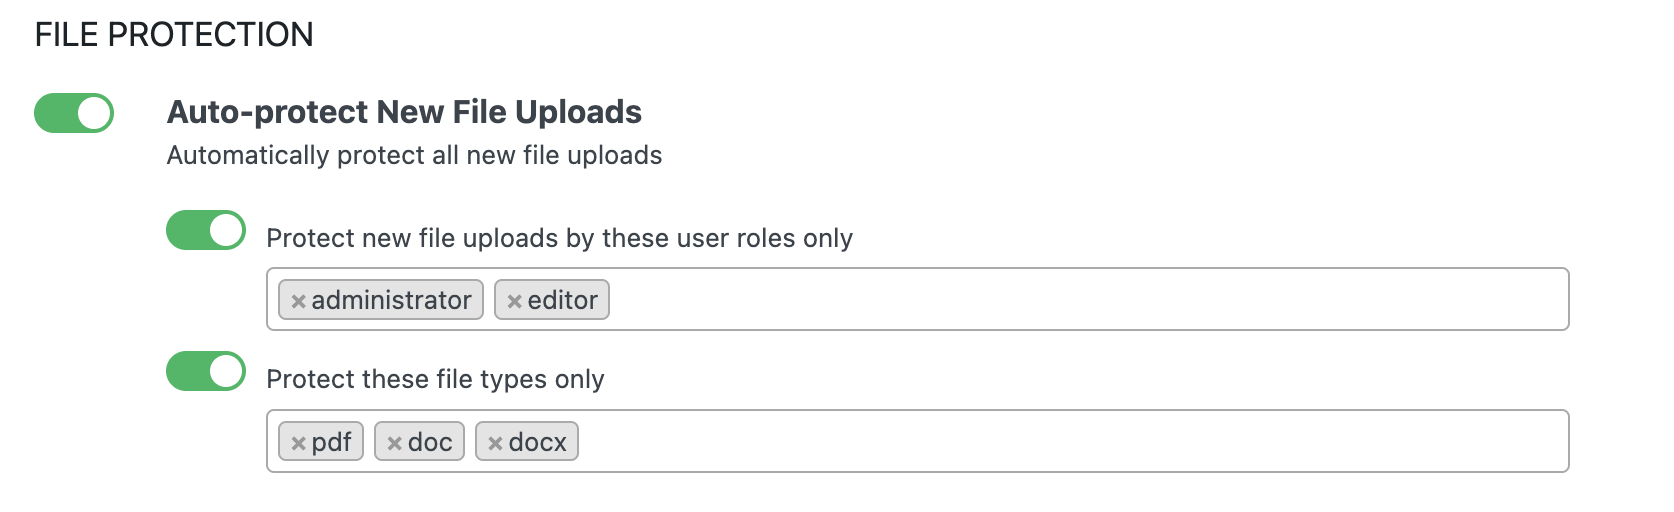
Important: Please note that any PDF, Doc, or Docx files uploaded to the website (by admin or editor roles) are automatically restricted (logged-in member viewing only).
5. Curator Feed
Important: If the feed has stopped, please log in to Curator.io and reconnect to Facebook (you will see a yellow triangle if there is a problem). There may have been an update to the Facebook API, or someone has changed a password, and the connection needs to be re-done.
6. Resizing images
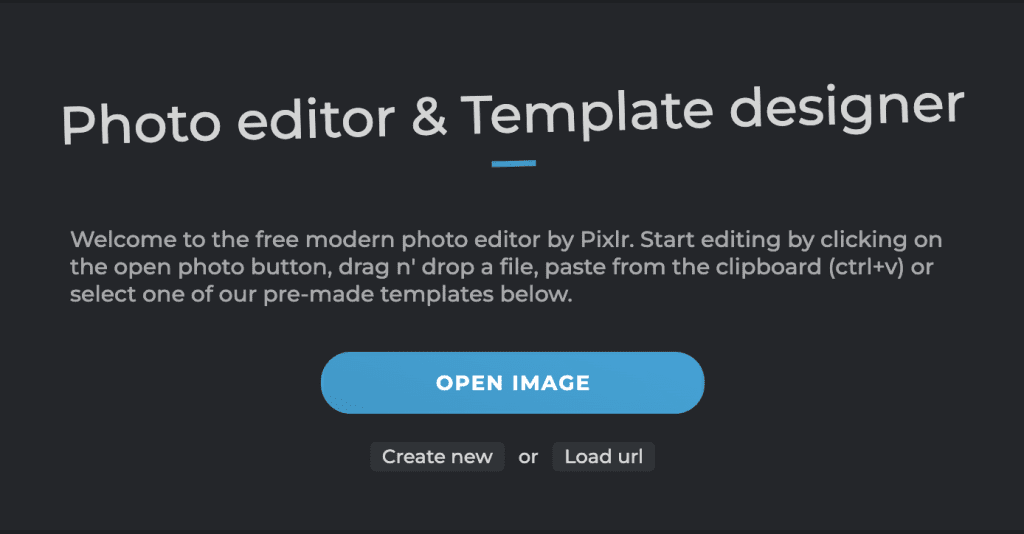
Here’s an online resizing program to help you resize your images: PIXLR
Website Image Sizes:
- top banner images – 1920px (width) x 500px (height). Under 300kb.
- in page images – about 1,000px wide or square. JPEG. Under 200kb.
- blog images – 1600px wide. JPEG. Under 200kb.
Pixlr Express Tips:
- Click the ‘OPEN IMAGE’ button – upload the image you’d like to resize.
- Select the ‘CROP TOOL’ icon. from the toolbar.
- Select the ‘ASPECT RATIO’ link and enter the desired ratio, e.g. for blog images 1600px wide x your desired height.
- Click ’SAVE’ to save a copy on your desktop.
Image issues
- If you don’t resize your images to the correct sizes above, you may find that they do not display properly, or it can affect the page’s speed if the image is too large.
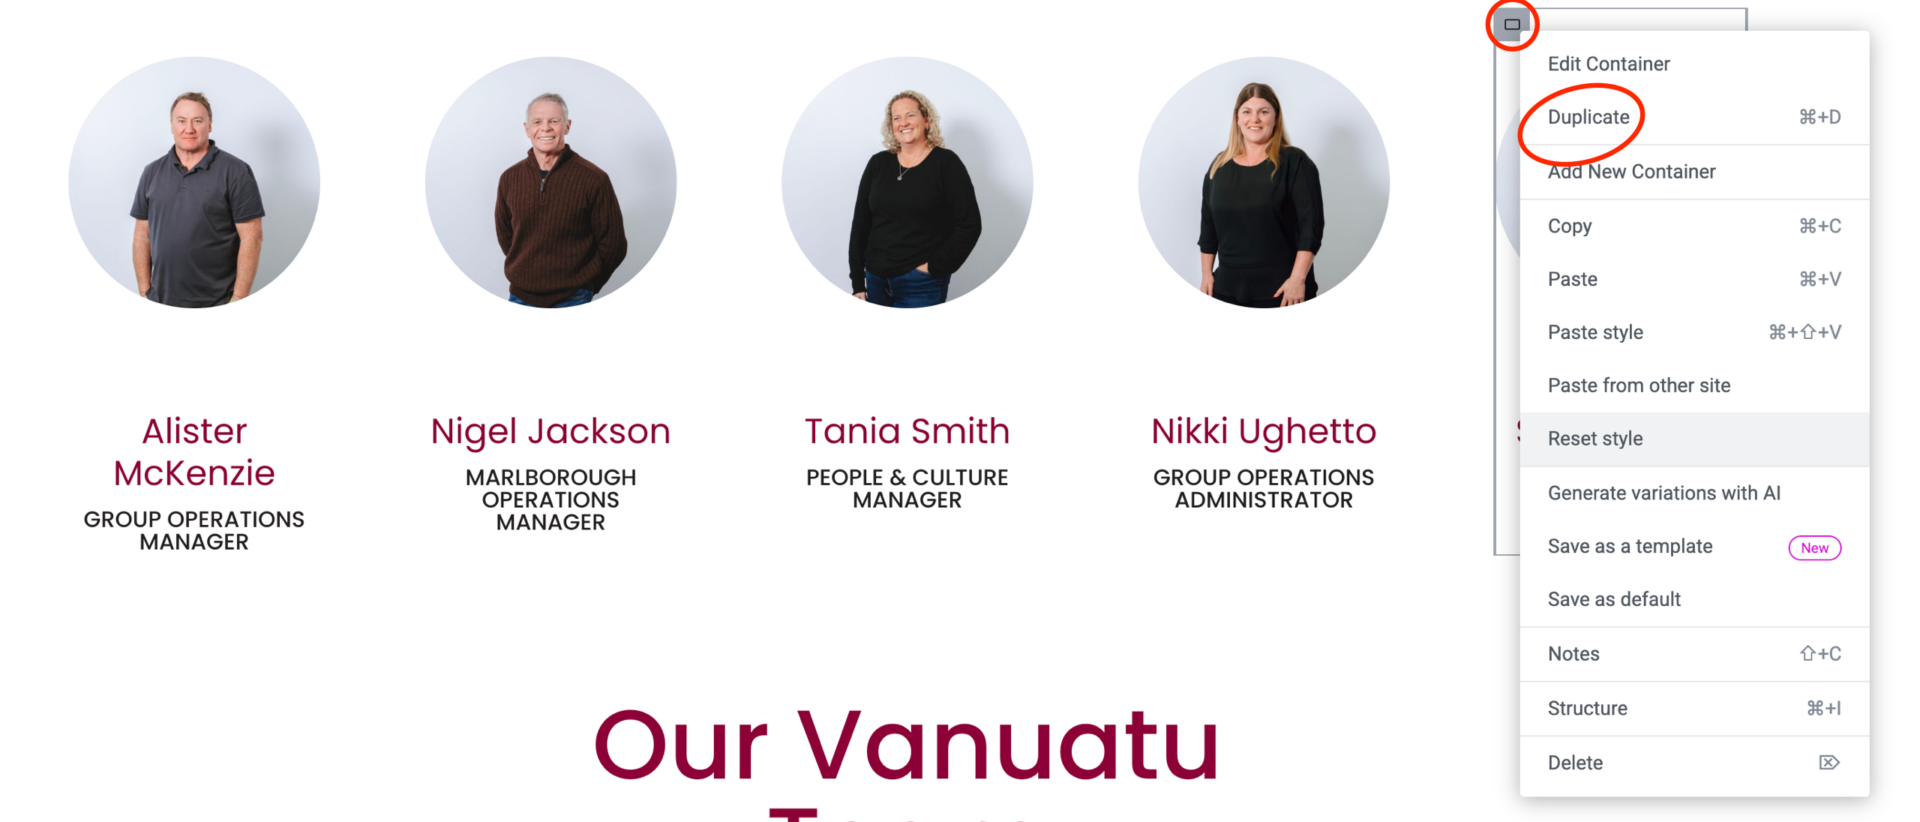
7. Changing the Number of Profile Columns
Reducing the number of columns, e.g from 6 to 5 columns:
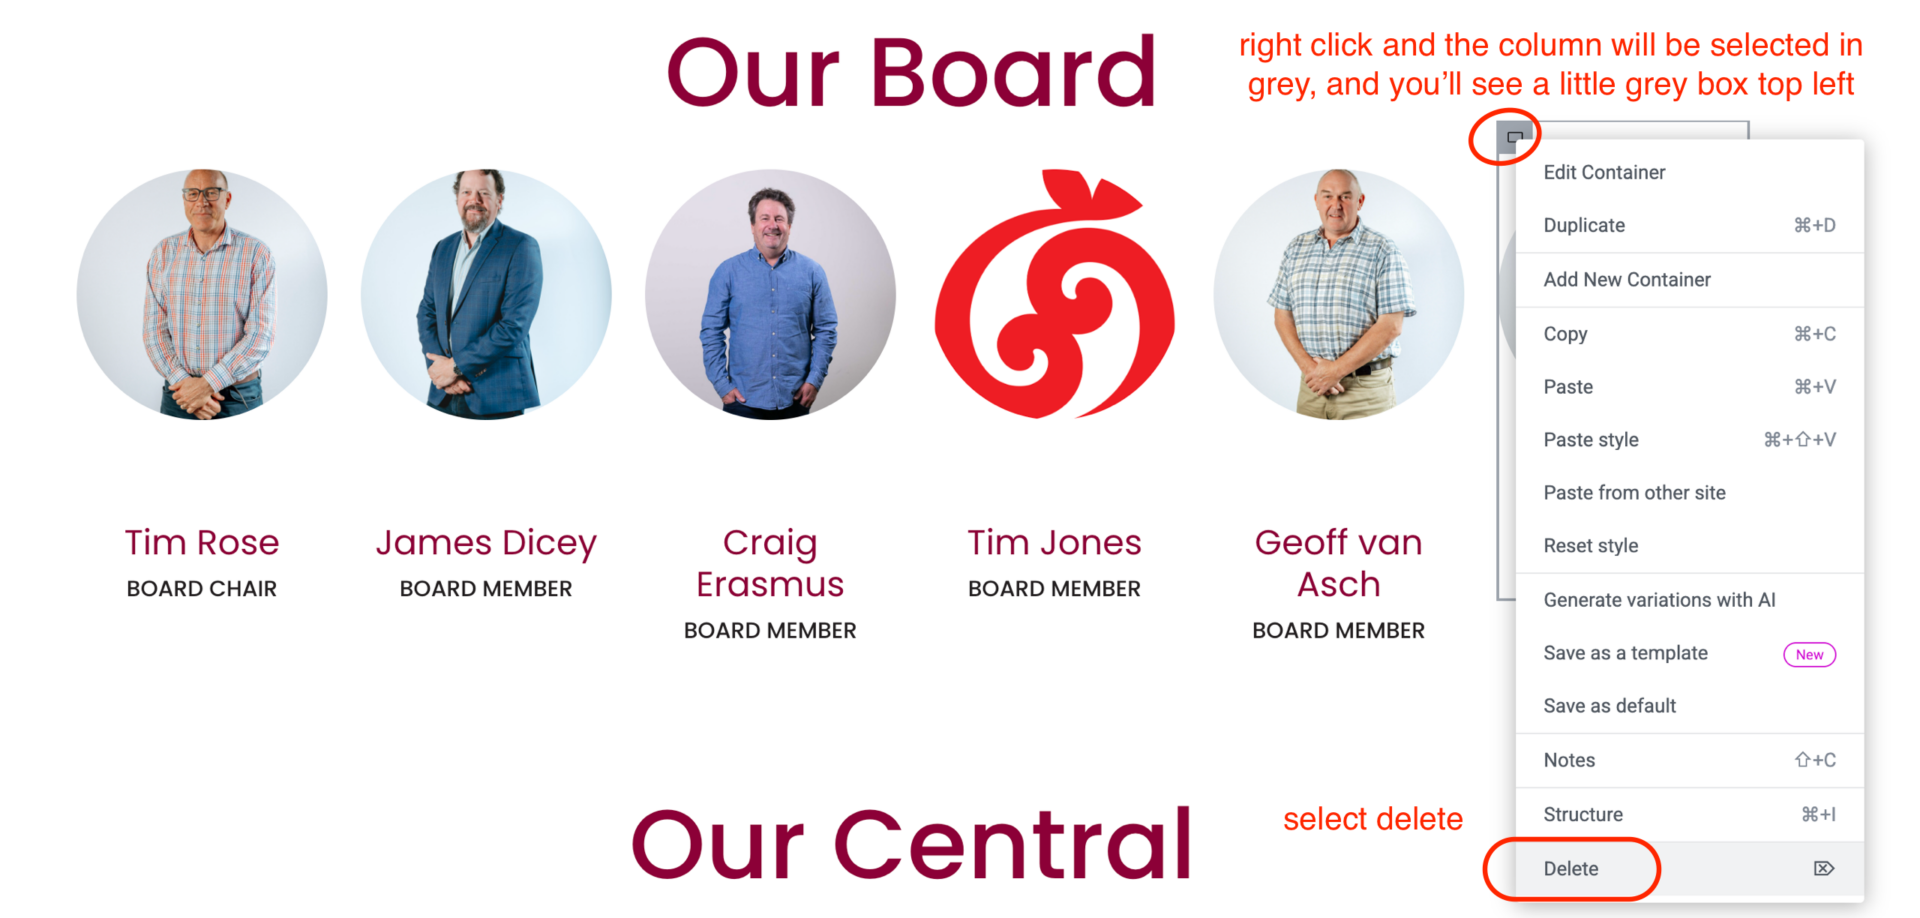
Increasing the number of columns, e.g 5 to 6 columns:
Further Support
If you can’t find the answer in the Elementor help section, please email us at info@Moxwai.com or call us.